How to Effectively Remove A Load Bearing Wall With A Small Budget
Do you love the idea of an open concept home, but you’re stuck navigating small rooms that aren’t very inspiring? It’s a scenario that lots of people come up against, but what do you do about it? Sure you could remove a wall and open things up, but what if it’s a load bearing wall?
It can be done effectively on a small budget and we’re going to show you how. We’ll walk you through step by step how to go about removing a load bearing wall, but first we’ll answer some common questions that might come up in the process.

What is a Load Bearing Wall?
Load bearing walls play a critical role in maintaining the structural integrity of a building. These walls are specifically designed to carry the weight of the structure and transfer it to the foundation below. Their primary function is to distribute the load from the upper floors, roof, and other components down to the ground, ensuring the stability and safety of the entire building.
If you’re looking to remove a load bearing wall, it is important to adhere to the regulations set by the building department. Building codes and guidelines vary from region to region.
Load bearing walls typically require the installation of a support beam or a load-bearing column to effectively distribute the weight and provide additional support. These support elements are strategically positioned to carry the load and prevent any structural failure.
The support beam, often made of steel or reinforced concrete, is placed horizontally across the top of the load bearing wall to help distribute the weight to the supporting columns or foundation.
Removing or altering load bearing walls without proper consideration can have serious consequences for the structural integrity of a building. It is crucial to consult a structural engineer or obtain the necessary permits and approvals from the building department before making any modifications.
Failure to comply with the regulations and guidelines can compromise the safety of the occupants and the overall stability of the structure.
How Do You Tell If It's a Load Bearing Wall?
If you’re not sure how to tell if a wall is load bearing, it's actually fairly straightforward. The first option is to head to the basement, if you have one, and examine the floor joists. If the wall in question is running parallel to the floor joists it's a partition wall, not a load bearing wall.
A load bearing wall, on the other hand, would be perpendicular to the floor joists, and they would abut against it, providing crucial support. This simple observation can give you a preliminary understanding of the wall's load-bearing nature before seeking professional advice from a structural engineer.

What Happens if You Remove A Load Bearing Wall?
The impact of removing a load bearing wall on your home's structural integrity is not a straightforward answer—it depends on various factors. If you remove a load bearing wall without replacing it with a suitable supporting structure, such as a support beam, it can jeopardize the stability and structural integrity of your home. Over time, without the necessary support, the weight from upper floors, roof, and other components will not be properly distributed, potentially leading to significant structural damage.
It is crucial to consider the regulations and guidelines set by the building department when dealing with load bearing walls. Seeking guidance from a structural engineer or a qualified professional is essential to ensure compliance with these regulations and to assess the specific requirements of your structure. They will evaluate the load bearing capacity of the wall and determine the appropriate course of action to maintain structural integrity.
If you plan to remove a load bearing wall, it may be possible to do so by replacing it with a support beam. A support beam, typically made of materials like steel or reinforced concrete, can effectively distribute the weight and provide the necessary support.
The size, material, and placement of the support beam will be determined by the load requirements and the architectural design of your home. It is essential to ensure that the support beam is appropriately sized and properly supported by columns or other load bearing structures to guarantee the structural stability of your home.
To ensure the safety and compliance of such a project, it is advisable to work closely with professionals experienced in structural engineering or construction. They will ensure that the replacement of the load bearing wall with a support beam meets the building codes and regulations set by the local building department. Additionally, they will perform the necessary calculations, reinforcements, and structural modifications to ensure the stability and integrity of the building throughout the process.

Do Single Story Homes Have Load Bearing Walls?
All homes have load bearing walls, including the four exterior walls that provide crucial support to the overall structure. However, depending on the architectural design and layout of your home, you may also have interior load bearing walls.
These interior walls help distribute the weight of the roof, upper floors, and any additional loads to the foundation. It's important to note that every home is unique in its design and load distribution, which is why seeking the advice of a structural engineer is highly recommended before embarking on any project involving load bearing walls.
Their expertise will ensure that the necessary precautions and measures are taken to preserve the structural integrity of your home while making any modifications or changes. By consulting a structural engineer, you can have the peace of mind knowing that your project will be carried out safely and in compliance with the specific requirements of your home's design..
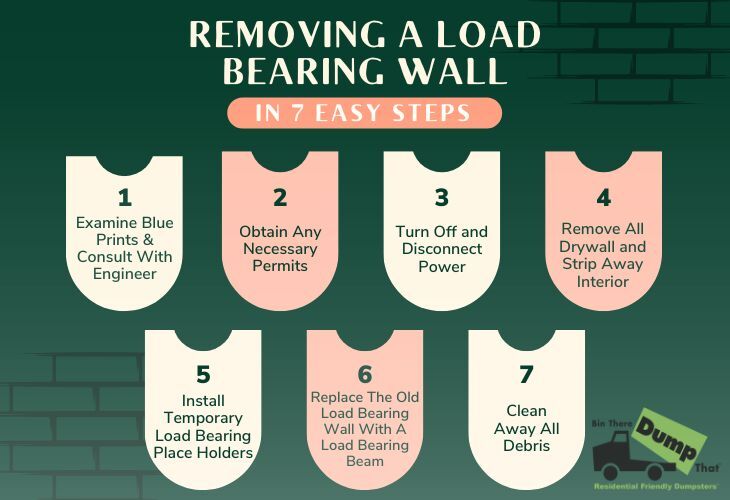
How to Remove a Load Bearing Wall: 7 Effective Steps

1. Examine Available Blue Prints and Consult With Engineer
No matter how handy you are or how many DIY projects you’ve taken on in the past, you don’t want to remove a load bearing wall without being prepared. If you have access to the original home blueprints that’s a great starting point. Any load bearing walls should be clearly indicated on this paperwork, saving you time and potentially helping you to prevent some serious damage to your home.
Whether you have access to the blueprints or not you should consult with a professional either way. If there’s an engineer in your family or circle of friends, you may be able to save yourself some money, but if not, don’t take any shortcuts here. The money you spend on consulting with an engineer could save you thousands in the long run. Even if it eats into most of your small budget, don’t skip this step.
2. Obtain Any Necessary Permits
Most jurisdictions require a building permit if you want to take on any major renovation work and removing a load bearing wall clearly fits in that category. Before you get started contact your city, county or region and request the permits you need.
If there’s any electrical wiring, plumbing or heating duct work inside the wall you’ll likely need separate permits to make alterations in these areas as well. Don’t start tearing down your load bearing wall until you have these permits in place.

3. Turn Off and Disconnect Power
Now that you’re ready with permits in hand don’t forget to shut off any power to wiring inside the wall and shut off water that could run through pipes inside the wall. If there are heating ducts that you’ll be redirecting, be sure to shut off your HVAC system as well before you get started removing a load bearing wall.
4. Remove All Drywall and Strip Away Interior
There’s one more thing you’ll need to consider before you start tearing into any drywall. There’s bound to be a fair bit of construction debris from your project, so it’s a good idea to think about renting a roll-off dumpster for your driveway. When you contact Bin There Dump That, you can feel secure in knowing our dumpster consultants will help you find the perfect size dumpster rental to get rid of your old drywall and debris.
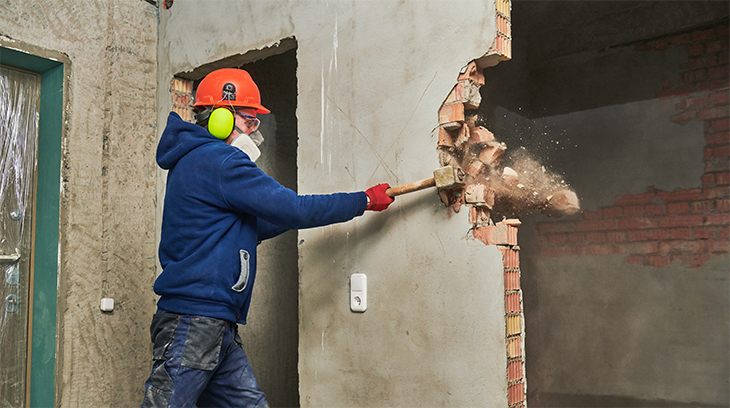
You’ll also want to make sure you have any tools and safety equipment required before you begin as well. After that go ahead and tear down that drywall and strip away everything inside that wall down to the framing.
5. Install Temporary Load Bearing Place Holders
The most affordable way to take down a load bearing wall once you have that professional advice from the engineer you consulted earlier, is to tackle the actual physical work yourself. If you have a friend or family member with a bit of construction knowledge willing to pitch in even better.
The first step is to strip away any drywall and paneling and then remove all wiring, piping and ductwork. For now leave the stripped down support structure of the wall in place. Before you move the load bearing wall completely you’ll need to set up temporary walls on either side of the existing one to take on the load bearing capacity while you work.
One temporary wall is not enough as it may not fully hold the weight of your home due to the placement of the temporary structure. Having one on either side of the original wall helps to compensate for their less than ideal placement.

6. Replace The Old Load Bearing Wall With A New Load Bearing Beam
The last step in the construction phase of your project is to install a new load bearing beam, strategically positioned in the same location where the old wall used to be. To enhance the strength and structural integrity of the load bearing beam, consider incorporating one or two supporting columns within the new open area along the length of the beam.
These columns will provide additional reinforcement and help protect the overall integrity of your home. By ensuring proper placement and support for the load bearing beam, you can confidently preserve the stability and strength of your structure throughout the project and beyond.
7. Clean Away All Debris
Now that you have your new load bearing beam in place you’ll want to make sure all of the debris from the load bearing wall you removed makes its way into the roll-off bin you rented. The last thing you want is some old rusty drywall screws left behind for a family member to step on.
After that, it’s just a matter of patching up any holes in the ceiling and floor and installing new flooring if necessary. With these steps you can effectively remove a load bearing wall on a small budget as long as you’re comfortable with DIY construction. The only major expense is the cost of consulting an engineer, but that step should definitely not be skipped!
Related Blog Posts
- Revive Your Home for Spring with This Spring Home Maintenance Checklist
- 10 New Home Trends That Will Make Your Friends Jealous
- How Our Dumpsters Support Realtors and Property Managers: A Comprehensive Guide
- 12 Jaw-Dropping Clutter Statistics That Will Make You Want to Declutter Today!
- Unlocking Space: The Complete Guide on Pocket Door Installation
- Step by Step Guide on How to Install Carpet Like a Pro


